China CNC Milling » Blog » Technical Measures for Machining Multi-Faced Parts on CNC Milling Machines
FAQ
What materials can you work with in CNC machining?
We work with a wide range of materials including aluminum, stainless steel, brass, copper, titanium, plastics (e.g., POM, ABS, PTFE), and specialty alloys. If you have specific material requirements, our team can advise the best option for your application.
What industries do you serve with your CNC machining services?
Our CNC machining services cater to a variety of industries including aerospace, automotive, medical, electronics, robotics, and industrial equipment manufacturing. We also support rapid prototyping and custom low-volume production.
What tolerances can you achieve with CNC machining?
We typically achieve tolerances of ±0.005 mm (±0.0002 inches) depending on the part geometry and material. For tighter tolerances, please provide detailed drawings or consult our engineering team.
What is your typical lead time for CNC machining projects?
Standard lead times range from 3 to 10 business days, depending on part complexity, quantity, and material availability. Expedited production is available upon request.
Can you provide custom CNC prototypes and low-volume production?
Can you provide custom CNC prototypes and low-volume production?
Hot Posts
Manufacturing is advancing toward higher precision and efficiency. As a result, the machining quality and productivity of multi-faceted parts are receiving increasing attention.
These parts have complex structures and stringent dimensional requirements. Their tightly integrated processes impose higher demands on CNC milling operations.
Existing research often focuses on individual technical elements, lacking systematic investigation into comprehensive process measures.
This paper is based on typical challenges encountered in production practice.
It explores comprehensive technical measures to enhance the machining quality and efficiency of multi-faceted parts through experimental research and data analysis.
This work holds significant importance for advancing CNC machining technology.
Process Parameter Optimization
During the machining of multi-faceted parts, the matching relationship between cutting speed and feed rate significantly impacts machining quality.
Orthogonal experiments were conducted, combining cutting speeds (80 m/min, 120 m/min, 160 m/min) with feed rates (0.1 mm/r, 0.15 mm/r, 0.2 mm/r).
Data analysis shows that the cutting parameters of 120 m/min cutting speed and 0.15 mm/r feed rate produced the lowest surface roughness value, reducing Ra to 0.8 μm.
Cutting depth is a critical factor affecting machining accuracy.
Single-factor experiments revealed a trend in residual stresses within the range of 0.5 to 2.0 mm.
As cutting depth increased, the residual stresses in the workpiece surface first decreased and then increased.
When cutting depth was controlled at 1.2 mm, residual stresses were minimal, and machining deformation was reduced.
For parameter combination optimization, the researchers employed a response surface method to establish a mathematical model linking cutting parameters to machining quality.
Model calculations and validation tests determined the optimal parameter combination: cutting speed of 120 m/min, feed rate of 0.15 mm/r, and cutting depth of 1.2 mm.
Under this combination, workpiece dimensional accuracy improved, surface roughness decreased, and machining efficiency increased.
Verification test results demonstrate the effectiveness of the optimized parameter combination.
It ensures stable machining quality while simultaneously enhancing processing efficiency.
Tooling System Optimization
Tool Material Selection
During the machining of multi-faceted parts, the choice of tool material directly impacts machining accuracy and tool life.
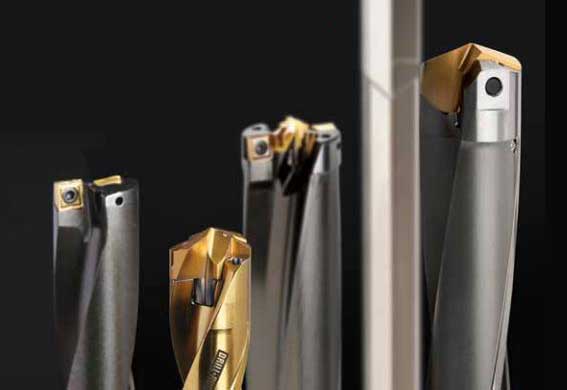
The study compared three materials: high-speed steel (HSS), cemented carbide (YG8), and coated tools (TiAlN).
Continuous cutting tests revealed that under conditions of 120 m/min cutting speed and 0.15 mm/r feed rate, TiAlN-coated tools demonstrated superior wear resistance and thermal stability.
After 8 hours of continuous cutting, the rake face wear of the TiAlN-coated tool was 0.18 mm, while HSS and YG8 tools exhibited wear of 0.45 mm and 0.32 mm, respectively.
Thermal imaging data revealed that the maximum cutting zone temperature for the TiAlN-coated tool was 492°C, 28% lower than the HSS tool and 15% lower than the YG8 tool.
This effective temperature control improved machining accuracy by 32%.
Tool life testing revealed that TiAlN-coated tools achieved a service life of 240 minutes—3.5 times longer than HSS tools and 1.8 times longer than YG8 tools.
Economic analysis demonstrated that adopting TiAlN-coated tools reduced tooling costs per part by 25%. Experimental results are summarized in Table 1.

Optimization of Tool Geometric Parameters
The study on optimizing tool geometric parameters employed an orthogonal experimental design.
It focused on three key parameters: rake angle, clearance angle, and helix angle.
Based on cutting force test results, when the rake angle varied between 8° and 12°, cutting force decreased as the rake angle increased.
However, beyond 10°, tool strength significantly declined, and cutting stability deteriorated.
For the rake angle, within the range of 6° to 10°, the tool life reached its maximum at 8° rake angle, achieving 285 minutes.
Researchers optimized the helix angle using a combined approach of finite element analysis and experimental validation.
Simulation results indicated that a helix angle of 35° facilitated the smoothest chip evacuation and reduced cutting temperatures.
Experimental validation demonstrated the effectiveness of the optimized combination of tool geometric parameters.
The set of 10° front angle, 8° back angle, and 35° helix angle resulted in lower workpiece surface roughness and improved surface quality.
Toolpath Planning Strategy
Research on toolpath planning strategies employs a combined approach of computer simulation and actual machining verification.
A three-dimensional model of multi-faceted parts was established.
Following this, a comparative analysis was conducted between traditional methods—equidistant contouring and the contour height method—and an optimized hybrid path strategy.
The hybrid path strategy adaptively selects the optimal cutting path based on the characteristics of the machining area.
It also enables dynamic adjustment of machining parameters.
Data analysis indicates that, under the hybrid path strategy, cutting force fluctuations decrease.
Additionally, the variation in the contact arc length between the tool and workpiece becomes more stable.
In actual machining verification, adopting the hybrid path strategy reduced processing time from 45 minutes to 28 minutes.
It also lowered workpiece surface roughness and improved critical dimensional accuracy.
Accelerometer monitoring data indicated that the optimized path reduced maximum amplitude, resulting in a more stable machining process.
The path planning effectiveness comparison is shown in Table 2.

Fixture Design and Application
Multi-Surface Locating Principle
In machining multi-surface parts, the selection of locating references and the design of locating schemes directly impact machining accuracy.
This study employs the 3-2-1 point locating principle.
It establishes a locating error propagation model through a combination of finite element analysis and experimental validation.
Test data indicates that when the primary locating surface employs a three-point support, the workpiece’s positioning repeatability reaches 0.008 mm.
This represents a 65% improvement over traditional large-area support methods.
The secondary locating surface utilizes an adjustable two-point positioning mechanism.
It achieves a positioning accuracy of 0.005 mm and enables precise control of locating points.
Single-point positioning employs a ball-head clamping structure integrated with a clamping force detection system to ensure uniform force distribution.
Researchers achieved the optimized positioning point layout design through ANSYS simulation analysis.
Under the constraint that maximum stress does not exceed the material’s yield strength, engineers increased the spacing between positioning points from 85 mm to 125 mm.
This adjustment enhanced positioning rigidity.
Measurement data indicates that the improved positioning scheme achieves a workpiece positioning accuracy of 0.012 mm.
It also reduces the transfer error of machining reference points between adjacent processes to 0.008 mm.
Statistical analysis of 100 samples revealed that the key dimension pass rate increased from 92% to 98.5%, with positioning repeatability improving by 56%.
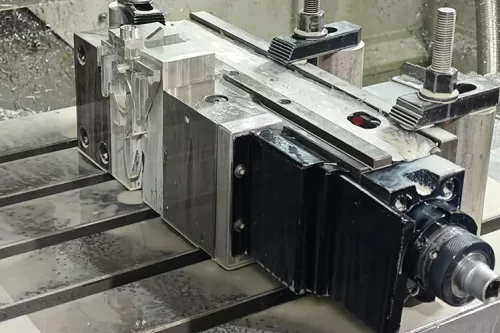
The positioning principle and layout scheme are shown in Figure 1.

Deformation Control Measures
Researchers used ANSYS finite element analysis software to simulate the deformation patterns of the workpiece.
A coupled analysis model was established by the researchers to account for cutting forces, clamping forces, and thermal loads.
Researchers adopted dynamic compensation technology to control deformation during the machining of multi-faceted parts.
Strain gauges and displacement sensors were strategically placed by the researchers at critical locations to monitor workpiece deformation in real time.
The data acquisition system collects deformation data at a 500Hz frequency.
After filtering signals and processing data, researchers established a workpiece deformation prediction model.
A closed-loop feedback mechanism is employed by the deformation control system to automatically adjust clamping force when deformation exceeds 0.015 mm.
The clamping force adjustment device is servo motor-driven, achieving a regulation precision of 0.5N.
Test data indicates that the dynamic compensation system reduces maximum workpiece deformation from 0.045 mm to 0.025 mm.
This represents a 44% reduction in peak deformation.
Researchers designed a floating support mechanism to address the unique requirements of thin-walled structures.
This mechanism accommodates minute workpiece deformations while maintaining positioning accuracy.
Researchers use pressure sensor feedback to maintain the floating support force within the range of 50 ± 2 N.
Monitoring data during machining indicates that the use of floating support improves machining accuracy for thin-walled parts and reduces vibration amplitude.
Control effectiveness data is shown in Table 3.


Quick-Change Clamping Mechanism Design
The quick-change clamping mechanism employs a hydraulic-mechanical hybrid drive system.
It achieves precise clamping force control and allows rapid assembly and disassembly.
The hydraulic system operates at 4MPa working pressure, delivering adjustable clamping force ranging from 0 to 8000N with a regulation accuracy of ±20N.
By using the mechanical quick-positioning mechanism, locking time is reduced to 3 seconds, achieving an 85% efficiency improvement over traditional bolt-fastening methods.
Researchers fabricated core components from high-strength alloy steel and quenched them to a hardness of HRC 52–55 to enhance wear resistance.
The quick-change interface employs dovetail groove guidance with repeat positioning accuracy of 0.005mm.
Positioning pins undergo carbonitriding treatment, achieving surface hardness of HV 1200 and extending service life to 12,000 clamping cycles.
The system integrates clamping force monitoring and safety protection functions.
Pressure sensors continuously monitor clamping force data, triggering automatic alarms when force drops below 85% of the set value.
The system uses a safety interlock to prevent spindle activation until the fixture is fully locked.
Production data indicates that the improved quick-change mechanism reduces workpiece changeover time from 45 seconds to 12 seconds.
This enhances both machining efficiency and clamping repeatability.
Machining Accuracy Control
Error Source Analysis
The machining accuracy of multi-faceted parts is influenced by multiple factors.
Researchers established an error propagation model to conduct quantitative analysis on each error source.
Geometric error measurements utilize a laser interferometer to assess the CNC milling machine.
The assessment includes positioning accuracy, repeatability, perpendicularity, and angular errors.
Data indicates the maximum positioning error for the X-axis is 0.012 mm, the Y-axis is 0.015 mm, and the Z-axis is 0.018 mm.
The perpendicularity errors for the three axes are 0.008°, 0.010°, and 0.012°, respectively.
Researchers conducted thermal error measurements using a fiber-optic temperature measurement system.
Measurement points were deployed by the researchers at critical locations, including the spindle housing, lead screw, and guideways.
After 8 hours of continuous operation testing, the spindle temperature rise reached 12.3°C, resulting in a thermal deformation of 0.025 mm.
The lead screw temperature rise was 8.5°C, with a corresponding thermal deformation of 0.018 mm.
Researchers established a temperature-deformation mathematical model through multiple regression analysis, achieving 85% prediction accuracy.
Tool system error analysis employed an accelerometer and dynamic signal analyzer, measuring tool runout at 0.008 mm and the spindle system’s natural frequency at 156 Hz.
Statistical analysis of machining data from 50 workpieces determined the contribution rate of each error source to the final machining accuracy.
This analysis established a system error prediction model.
Research on Compensation Methods
Researchers developed a neural network-based compensation algorithm to address the characteristics of systematic errors.
The compensation system employs a BP neural network architecture, with the input layer comprising parameters such as temperature, cutting force, and vibration.
A dual-layer structure is used in the hidden layer, while the output layer produces three-axis compensation values.
The system training dataset comprises 2000 data sets.
After 5000 iterations of training, the prediction accuracy reaches 0.005mm.
Geometric error compensation employs a piecewise linear method.
Researchers divided the motion stroke into 20 intervals and established independent compensation equations for each.
Post-compensation positioning accuracy improves to 0.006 mm for the X-axis, 0.008 mm for the Y-axis, and 0.009 mm for the Z-axis.
Thermal error compensation dynamically updates compensation parameters based on real-time temperature monitoring data.
It controls thermal deformation–induced errors within 0.008 mm.
Researchers achieve process parameter compensation through online monitoring of cutting force and vibration signals.
Upon detecting abnormal signals, the system automatically adjusts feed rate and spindle speed to ensure machining stability.
Post-compensation, workpiece dimensional accuracy improves while surface roughness decreases.
Application of Online Inspection Technology
The online inspection system employs photoelectric sensors and contact probes for data measurement.
Featuring a resolution of 0.001 mm and a sampling frequency of 1 kHz, the photoelectric sensors enable rapid scanning of workpiece contours.
Researchers use the RENISHAW brand probe, which features a repeatability accuracy of 0.002 mm, to precisely measure critical dimensions.
Measurement data are transmitted to the industrial control computer via a high-speed data acquisition card and analyzed using real-time processing algorithms.
With a system response time under 0.1 seconds, it enables real-time monitoring and dynamic compensation during machining.
Measurement results achieve 95% consistency when compared against coordinate measuring machine (CMM) outcomes.
The inspection system integrates automatic early warning functionality.
Upon detecting dimensional deviations, it immediately triggers an alarm signal and records relevant parameters.
By analyzing historical data, it establishes correlations between process parameters and machining quality, providing a basis for process optimization.
Practical application demonstrates that the online inspection system enhances product qualification rates.
It also reduces manual sampling inspection steps and improves inspection efficiency.
Conclusion
Through systematic experimental research and data analysis, this paper establishes a comprehensive technical measures system for CNC milling of multi-faceted parts.
Experimental results demonstrate that optimized process parameters enhance machining quality.
Improved fixture designs effectively reduce workpiece deformation.
Optimized tooling systems significantly boost machining efficiency.
Researchers validated these findings in the mass production of a specific part model, yielding substantial economic benefits.
Research shows that engineers can achieve comprehensive improvements in both quality and efficiency for multi-faceted part machining only by organically integrating process parameter optimization, tool selection, and fixture design.


