China CNC Milling » Blog » Slender Shaft Turning Techniques for High-Precision Machining
FAQ
What materials can you work with in CNC machining?
We work with a wide range of materials including aluminum, stainless steel, brass, copper, titanium, plastics (e.g., POM, ABS, PTFE), and specialty alloys. If you have specific material requirements, our team can advise the best option for your application.
What industries do you serve with your CNC machining services?
Our CNC machining services cater to a variety of industries including aerospace, automotive, medical, electronics, robotics, and industrial equipment manufacturing. We also support rapid prototyping and custom low-volume production.
What tolerances can you achieve with CNC machining?
We typically achieve tolerances of ±0.005 mm (±0.0002 inches) depending on the part geometry and material. For tighter tolerances, please provide detailed drawings or consult our engineering team.
What is your typical lead time for CNC machining projects?
Standard lead times range from 3 to 10 business days, depending on part complexity, quantity, and material availability. Expedited production is available upon request.
Can you provide custom CNC prototypes and low-volume production?
Can you provide custom CNC prototypes and low-volume production?
Hot Posts
Experienced machinists often say: “Planners dread planing thin sheets, drillers dread drilling small deep holes, and turners dread turning slender rods.”
As the name suggests, a slender shaft is an axle that is both thin and long.
Engineers typically classify any shaft with a length exceeding 25 times its diameter as a slender shaft.
In other words, shafts with a diameter-to-length ratio greater than 1:25 fall into this category.
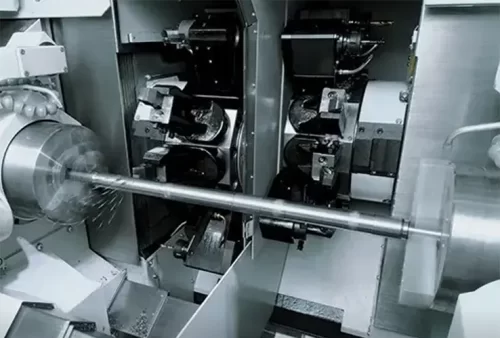
Shafts with ratios reaching 1:100 or higher present even greater machining challenges, as illustrated in Figure 1.
Slender shaft parts are critical components in many types of mechanical equipment.
They are widely used in components such as lead screws, drive shafts, and guide shafts.
During operation, these components often work under extremely harsh conditions.
Typical operating conditions include high temperatures and high rotational speeds.
To ensure smooth operation of mechanical equipment, strict requirements must be met.
Reducing failure rates is a key objective. Engineers must apply higher technical standards during machining and assembly.
These standards apply throughout the production and installation of such components.
The goal is to ensure that the components achieve a specified level of rotational precision.
Issues and Specific Analysis in Turning Processes
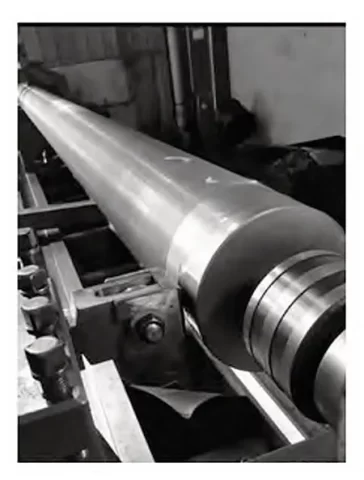
The difficulty in machining slender shafts during turning primarily stems from the high ratio of their length to diameter.
The bending resistance of slender shafts inversely correlates with this ratio—the lower the bending resistance, the poorer the rigidity, making bending deformation more likely.
Due to this low rigidity, maintaining dimensional accuracy, geometric accuracy, and surface roughness becomes challenging.
During actual turning operations, the following issues commonly arise:
(1) When subjected to external forces, particularly radial forces, the slender shaft is prone to bending deformation.
This induces vibration, resulting in surface roughness failing to meet technical specifications.
(2) During machining, cutting heat can also cause bending deformation.
This occurs because thermal expansion during turning causes axial elongation, while the fixed clamping distance at both ends creates compression.
Since the distance between the machine tool centers remains unchanged after thermal expansion, the slender shaft experiences compression from the machine, potentially rendering it unworkable.
(3) Without intermediate support, slender shafts sag under their own weight, causing bending deformation and vibration.
This leads to defects such as bamboo-jointing, diamond-shaped, or date-seed-shaped profiles, compromising machining quality.
(4)Machinists typically use lower spindle speeds during turning operations on slender shafts due to these factors.
Spindle speed control is essential to prevent excessively high rotational speeds.
During actual turning operations, slender shafts experience machining errors due to their high length-to-diameter ratio and cutting forces.
Various machine tool errors affect machining quality and precision.
These errors include rolling errors and deflection errors.
In addition, factors such as fixture accuracy and tool handling also play a role.
Together, these factors lead to a reduction in machining quality and precision.
Table 1 analyzes the sources of these errors.
| Wear | Deformation of Cutting System | Thermal Deformation | Machine Tool Geometric Errors |
|---|---|---|---|
| Tool wear Friction wear of machine tool parts | Recovery of local elastic deformation caused by clamping force and cutting force | External heat source Machine feed drive Cutting temperature | Positioning error Positional error Angular misalignment error Perpendicularity error Parallelism error Straightness error |
Therefore, turning slender shafts requires high overall technical standards.
Engineers place high demands on the cutting tools used.The lathe’s precision grade also plays a critical role.
Careful selection of relevant auxiliary tools is necessary.
The arrangement of turning processes must be well planned.
Operators must strictly control specific operational procedures.
Researchers have analyzed how machining parameters influence cutting forces and vibrations.
These machining parameters include cutting speed, depth of cut, and feed rate.
Researchers base the analysis on transverse vibration theory in slender shaft machining.
They apply simulation and numerical methods in the study.
Software tools such as ANSYS are commonly used to support this analysis.
They have also examined how variations in spindle speed, tool followers, and axial forces impact shaft machining.
Consequently, researchers have proposed measures to improve slender shaft turning quality.
One measure is to determine optimal spindle speeds.These speeds are selected to avoid resonance zones.
Another measure is the implementation of error compensation machining techniques.
Preparation for Turning Slender Shafts
Processing Requirements for Slender Shafts
Traditional machining processes for slender shafts often result in significant deformation and poor quality consistency.
Engineers must take appropriate measures to control pre-existing bending in slender shafts.
They must also address bending caused by the shaft’s own weight after clamping.
They eliminate internal stresses generated during hot and cold processing.
Engineers must perform reasonable straightening on shafts with bending exceeding 0.1 mm along their entire length.
This straightening should occur before, during, and after the turning process.
Straightening methods before and after turning include hot forging straightening, cold pressing straightening, hammering straightening, tapping straightening, and quenching straightening.
The final quenching straightening method is applicable when surface marks are unacceptable.
Hot straightening is preferred for larger-diameter slender shafts, while cold straightening is suitable for smaller diameters.
Aging treatment may sometimes follow straightening.
Straightened slender shafts reduce vibration during machining, ensure uniform turning allowances, and lower residual surface stresses to minimize significant deformation.
Machine Tool Preparation.
Due to the unique characteristics of slender shafts, their turning process imposes stringent demands on the machine tool’s inherent precision.
The lathe’s accuracy directly impacts both the machining quality and production efficiency of slender shafts.
First, adjust the tailstock position to ensure the shaft centerline is parallel to the machine bed guideways.
Next, align the tailstock center with the headstock spindle (or center) for lateral concentricity.
Additionally, set appropriate clearances for the tailstock, cross slide, and saddle wedges.
This prevents tool snagging and enables precise feed control.
Requirements for the tailstock follower
The tailstock follower is an indispensable accessory for turning slender shafts.
Its use is a critical measure to prevent shaft bending deformation and resist radial and vertical cutting forces.
Therefore, several requirements apply to the follower:
① The outer diameter of each support pillar and the corresponding bore on the tool rest must maintain a sliding fit without looseness.
The clearance should be 0.02–0.03 mm to ensure smooth operation.
The pillar extension length should not exceed half the bore depth to preserve stability.
② Select gray cast iron for the support claw material.
This material offers high wear resistance and readily forms a hardened surface layer when cooled by cutting fluid.
It exhibits minimal wear during use, ensuring machining accuracy without damaging the surface of slender shafts, thereby preserving their surface roughness.
③ When grinding the contact surfaces between the support claws and the slender shaft, ensure optimal contact with the shaft surface.
Failure to do so may cause vibration during high-speed cutting, resulting in elliptical deformation and faceting of the shaft, which compromises machining quality.
Process Measures for High-Speed Turning
Selection and Use of Turning Tools
Operators address issues such as dynamic balance, chuck centering reliability, tool heating, and wear during high-speed turning of slender shafts by using 90° offset tools and 75° offset tools.
These tools exhibit reduced radial resistance.
Their cutting edges feature chip-curling grooves ground to a width of 4–6 mm and depth of 1.5–1.7 mm.
This design creates a -3° rake angle between the groove and main cutting edge, minimizing cutting and frictional resistance while enhancing heat dissipation.
Consequently, chip coiling is more effective than with standard turning tools, enabling faster chip evacuation with a more stable direction.
This ensures safety while minimizing surface damage to the slender shaft.
To enhance edge strength, a 0.15–0.2 mm chamfer with a -20° angle is ground onto the main cutting edge using an oilstone.
For rough turning, employ a depth of cut of 3–4 mm with a feed rate of 0.3–0.6 mm/rev.
For semi-finish and finish turning, use a depth of cut of 0.5–2 mm with a feed rate of 0.2–0.4 mm/rev.
Selecting a chamfer angle of -20° softens chips formed within a very small cutting area.
These chips form linear secondary chips during ejection, exiting simultaneously with primary chips.
This process removes built-up edges formed on the workpiece surface during cutting, thereby improving surface roughness on slender shafts.
To effectively grind and utilize turning tools, one must not only understand the selection of tool geometry angles and grinding principles but also master grinding techniques.
For grinding turning tools, use green silicon carbide grinding wheels. Rough grinding should use wheels with a grit size of 46–80 and a hardness of R3.
For finish grinding, use wheels with a grit size of 120–180 and a hardness of ZR1.
When turning slender shafts, reduce feed rate per pass while increasing the number of passes to minimize or eliminate internal stresses generated during machining.
In practical mechanical processing, selecting appropriate cutting parameters is essential.
Proper selection maximizes machine tool utilization.It also helps extend the service life of cutting tools.
Additionally, it enhances overall machining efficiency.Finally, it ensures consistent and stable machining quality.
Selection of tailstock centers
During turning of slender shafts, friction between fixed centers and the center hole generates cutting heat, making high-speed cutting unsuitable.
Operators commonly use live centers, specifically elastic rotating centers.
These effectively compensate for thermal deformation and elongation of the shaft caused by thermal expansion.
Practice demonstrates that live centers made with lightweight three-row ball bearings deliver high machining accuracy, excellent concentricity, and extended service life, yielding superior results.
Selection of Coolant
During high-speed turning, the workpiece temperature must remain below ambient (20–25°C) to minimize thermal deformation of slender shafts.
Additionally, elevated temperatures can cause the support jaws to scratch the shaft surface.
Proper coolant selection directly impacts the forming quality of slender shafts and tool life.
Practical testing with various cutting fluids reveals that emulsifiable coolants deliver superior results by simultaneously lubricating and cooling.
Coolant lubricants reduce friction between chips and the shaft by forming a partial lubricating film, maintaining optimal cutting conditions.
They also absorb significant heat generated during machining, minimizing thermal deformation and elongation of the shaft while reducing errors caused by temperature fluctuations.
Heavy-duty Reverse Feed Method
In recent years, the heavy-duty reverse feed method for turning slender shafts has become increasingly common.
This technique involves the tool advancing in the reverse direction along the guideways from the chuck toward the tailstock.
It significantly improves both machining quality and production efficiency, prevents bending of the slender shaft due to cutting forces, and reduces cutting deformation caused by these forces.
This method is suitable for single-set machining of long shafts on extended lathes, employing medium-speed rough turning with large feed rates and low-speed finishing.
It offers high adaptability, relatively high machining efficiency, and less stringent requirements on machine tool precision.
When applying powerful reverse feed turning for slender shafts, corresponding improvements must be made to the tool mounting method, fixtures, cutting tools, and machining techniques.
Conclusion
Slim shafts feature a simple profile, yet their susceptibility to bending and deformation during turning imposes stringent demands on machining processes.
By analyzing factors affecting the quality and precision of slim shaft turning and referencing relevant scholarly research, this paper proposes methods to enhance machining accuracy.
(1) Employing high-speed turning that avoids resonance zones, straightening the slender shaft before and after machining, and adjusting the machine tool and tool follower can all contribute to improving machining accuracy.
(2)The selection and use of auxiliary support tools are crucial for slender shaft machining.
These tools include turning tools, tailstock centers, and coolant lubricants.
In addition, the application of cutting force improvement techniques plays an important role.
For example, powerful reverse feed methods can be employed.
Together, these factors significantly influence the machining quality of slender shafts.
With advancements in machining technology, new opportunities have emerged for slender shaft processing.
Interdisciplinary approaches further enhance these capabilities.
Computer software simulations can be used to model machining processes.
Relevant experimental methods also provide valuable insights.
Together, these techniques allow researchers to obtain necessary data for specific slender shaft machining processes at a low cost.
This enables dynamic simulation analysis of vibration and deformation.
Only through such analysis can the machining process route be further optimized.
It also helps reduce vibration and deformation of slender shafts.
High machining precision can be effectively enhanced.
Furthermore, the stability and reliability of slender shaft machining are improved.
