


Because of material and manufacturing constraints or structural and functional requirements, manufacturers typically divide a complete plastic packaging unit into multiple components for separate production.
They then assemble these parts into a unified whole using methods such as bonding, welding, or snap-fit connections.Various joining methods exist, each with distinct characteristics.
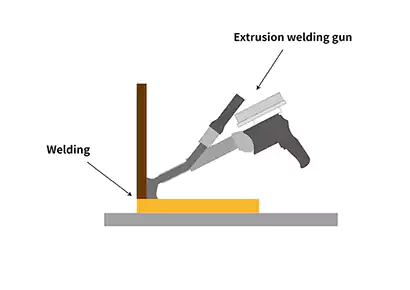
Adhesive Bonding and Welding Considerations
Adhesive bonding requires a minimum bonding surface width of 10mm to ensure secure adhesion.
Operators must carefully apply adhesives to prevent overflow, which can significantly impact component cleanliness and hygiene.
Transparent plastic components are unsuitable for adhesive bonding due to significant visual impact.
Welding methods include ultrasonic welding and high-frequency welding, which offer small weld areas and high speed. For large-area fixation, operators perform multi-pass welding.
They ensure material compatibility—only compatible plastics can be welded together, while dissimilar plastics generally cannot be joined.
Interlocking connections utilize the plastic material’s inherent plastic deformation. After interlocking, the parts return to their original shape, achieving a secure connection.
Interlocking connections offer stable functionality and simple assembly, typically featuring a snap-fit mechanism.
Disassembly and reassembly are easier than with adhesive bonding or welding, requiring no specialized tools.
However, interlocking structures are relatively complex, necessitating sufficient plastic deformation allowance, and narrow flanges can be challenging to conceal.
As a key method for interconnecting plastic packaging components, investigating the design principles of snap-fit structures holds significant value and importance.
Types of Snap-Fit Connections
There are primarily two types of snap-fit connections: snap-in connections (see Figure 1) and snap-to-snap interconnections (see Figure 2).
Manufacturers mainly use snap-in connections on the top, bottom, and sides of packaging boxes.
After assembly, they provide a secure connection that resists deformation and offers excellent positioning control, making them widely applicable.
Manufacturers primarily use snap-to-snap interconnections to connect plastic components.
These connections feature a higher snap-fit height, which can cause deformation and failure. However, designers still use this method in specific scenarios.


Undercut Connection Design Essentials
In undercut connection structures, designers most frequently use undercut holes, typically positioning them on the outer side or edge of the connecting component.
Generally, the thickness of the undercut cantilever is b = 0.6·a, where a is the shell wall thickness.
This thickness ratio effectively minimizes the impact of cooling shrinkage on the shell’s appearance.
When this ratio fails to meet aesthetic requirements, designers can further reduce it to values like 0.5 or 0.4.
If reducing the cantilever thickness is not feasible while maintaining the undercut cantilever’s functionality, they can add a thickening step at the base of the cantilever.
This increases the local wall thickness of the shell part and also mitigates the impact of cooling shrinkage on the part’s appearance.
Key Parameters for Undercut Height and Deformation Requirements
The height of the undercut cantilever is c = d + m, where d is the clearance between the snap-fit tooth and the connecting part, typically set at 0.2 mm, and m is the wall thickness of the connecting part.
For two plastic connectors, designers determine their wall thicknesses, a and m, before specifying the undercut cantilever thickness, b, and height, c.
If the plastic deformation of the undercut is insufficient to meet the mating deformation requirements, they must either increase the gap between the two connectors or enhance the local thickness of the connectors.
This approach satisfies both the plastic deformation requirements of the undercut cantilever and the mating requirements of the connectors.
Engagement Tooth, Keyhole Design, and Assembly Guidance
Typically, the engagement tooth width e for a keyhole connection is ≥1 mm.
For interlocking engagement, where cantilever deformation is greater, the engagement tooth width e is ≥1.5 mm.
The undercut width k = b + e, and the keyhole width f – k ≥ 0.5 mm.
The keyhole must provide sufficient deformation space for the undercut to deform smoothly into the hole, achieving the engagement connection.
Designers typically apply chamfers to the undercut g position and the hole h position to guide assembly, facilitate operations, and improve assembly efficiency.
If the hole position is constrained and insufficient for chamfering, or if exposed chamfers affect appearance, they omit the chamfers.
However, the undercut g position must retain a chamfer for assembly guidance.
Designers generally set guidance chamfers at 45°. When controlling the snap tooth height j to minimize the snap’s visual impact, they may appropriately increase the chamfer angle to reduce j.
They must ensure the snap tooth height i is ≥0.5 mm. Increasing i improves snap tooth rigidity and reduces the probability of snap failure, but it also increases the snap tooth height j.
When controlling the snap height j, designers comprehensively evaluate both the snap height i and the guide chamfer g to meet functional and design requirements.
Theoretical Calculation of Deformation
During the assembly of plastic components, undercut cantilevers require sufficient deformation capacity to meet assembly requirements.
After completing the assembly action, the undercut cantilever must recover its deformation to satisfy the locking requirements.
Designers refer to this type of deformation as elastic deformation.
Within the elastic limit, elastic deformation encompasses four fundamental types: tensile/compressive deformation, shear/bending deformation, and torsional deformation.
The deformation of a reverse-flange cantilever involves bending deformation, with the deformation amount defined as deflection.
Designers treat an inverted cantilever without stiffeners as a simply supported beam, allowing them to calculate deflection using standard formulas for such beams.
Figure 3 below shows the simplified diagram, deflection curve equation, and maximum deflection calculation formula for the inverted cantilever.
Figure 3 Schematic Diagram of a Reinforcement Free Inverted Cantilever Beam, Deflection Equation, and Maximum Deflection Calculation Formula.

Designers commonly use rectangular and annular sections for plastic packaging inverted cantilevers.
The formulas for calculating their sectional moments of inertia are entirely different.
Rectangular and Annular Section Inertia Formulas
The moment of inertia for rectangular sections is relatively straightforward.
When a cantilever section with an inverted plastic packaging has a rectangular cross-section, the bending force typically acts across the width of the rectangular section.
Therefore, the formula for the moment of inertia of a rectangular section in the direction of its width is:
")
Designers define b as the width of the rectangular cross-section and h as its thickness.
Moment of Inertia for Sector and Annular Sections
The moment of inertia for a sector-shaped cross-section is relatively complex.
First, determine the moment of inertia for the sector-shaped cross-section. Set the origin of the coordinate axes at the center of the sector, with the central angle θ.
Designate the vertical axis as the axis of symmetry for the sector.
Based on the definition of moment of inertia and using the integral ratio method, engineers derive the formula for the moment of inertia of the sector cross-section with respect to the horizontal coordinate in this coordinate system as:
")
Step 2: Calculate the moment of inertia for the annular cross-section.
When a planar cross-sectional shape consists of multiple simple shapes: first calculate the moment of inertia of each simple shape about the same coordinate axis, then sum these values to obtain the total moment of inertia of the entire shape about that axis.
Accordingly, with the coordinate origin at the center of the annular section, the central angle θ, and the vertical axis as the axis of symmetry, the formula for the moment of inertia of the annular section about the horizontal coordinate of this coordinate system is:
")
Where R denotes the outer radius and r denotes the inner radius.
Final Moment of Inertia for the Annular Segment
Finally, engineers derive the sectional moment of inertia of this annular segment relative to its horizontal coordinate axis using the formula for the static moment of a planar figure, the coordinate calculation formula for the centroid of a composite figure, and the parallel axis theorem for a planar figure’s moment of inertia.
The calculation formula is:
")
θ is in radians.
Formula for the Deflection Length of an Inverted Cantilever
From the previous deflection formula, the deflection at the point l along the cantilever is given by:
")
To facilitate rapid determination of the minimum cantilever length during reverse-flange design, engineers can perform calculations using an Excel spreadsheet or specialized software, as shown in Figure 4.
Given the convenience of data entry in Excel and common angular measurement practices, they express the central angle in Figure 4 in degrees.
They then convert this value to radians before applying it in the sectional moment of inertia formula.

Undercut Cantilever Deformation: Theory vs. Simulation
Theory–Simulation Comparison of Undercut Rectangular Cantilevers
The undercut material is ABS with elastic modulus E = 2.2 × 10³ MPa. The undercut tooth deformation W = 1.5 mm, and the force acting on the undercut tooth F = 64 N.
(1) Cantilever rectangular section width b = 8 mm, thickness h = 1.5 mm.
Rectangular section moment of inertia I = (b·h³)/12 = (8×1.5³)/12 = 2.25 mm⁴. Cantilever length l ≈ 7 mm. Simulation comparison shown in Figure 5.

(2) Cantilever rectangular cross-section with width b = 10 mm and thickness h = 1.2 mm. The moment of inertia I = (bxh³)/12 = (10 × 1.2³)/12 = 1.44 mm⁴.
Cantilever length l ≈ 6 mm. Simulation comparison is shown in Figure 6.

Undercut Fan Ring Cantilever Length: Theory vs. Simulation
The undercut material is ABS with elastic modulus E = 2.2 × 10³ MPa. The undercut tooth deformation W = 1.5 mm, and the force acting on the undercut tooth F = 64 N.
(1) The cantilevered fan-shaped ring section has an outer radius R = 10 mm, inner radius r = 8.5 mm, central angle θ = 90°, sectional moment of inertia I = 17.83 mm⁴, and cantilever length l ≈ 14 mm.
The simulation comparison is shown in Figure 7.

(2) The cantilevered fan ring has an outer radius R = 10 mm and an inner radius r = 8 mm, with a central angle θ = 60°.
Its sectional moment of inertia I = 8.19 mm4, and the cantilever length l ≈ 10.8 mm. The simulation comparison is shown in Figure 8.

Conclusion
This paper focuses on several key aspects of undercuts in plastic packaging: structural classification, design principles, calculation of moment of inertia for rectangular or annular cross-sections, theoretical design length calculation for cantilevered sections without stiffeners, and cross-validation of undercut functionality through simulation and theoretical analysis.
The design principles for undercuts outline the dimensional relationships that must be satisfied across various components during the design process to meet requirements for appearance, functionality, and assembly.
The calculation of the moment of inertia for rectangular or annular cross-sections lays the theoretical foundation for determining the theoretical design length of an unsupported cantilever.
The calculation of the theoretical design length for unsupported cantilevers treats the cantilever as a simply supported beam, determining its theoretical design length via beam deflection formulas.
Simulated verification employs simulation techniques to cross-validate with theoretical cantilever length calculations, further ensuring the undercut structure meets functional requirements.
This research demonstrates the significant value and importance of designing undercut structures within constrained spatial dimensions.