


Nickel-based high-temperature alloys, exemplified by GH4169, typically exhibit a hardness of 346–450 HBW. This material is an ideal manufacturing choice for aircraft engines. It offers high thermal strength, excellent mechanical properties, and strong corrosion resistance.
However, as a typical difficult-to-machine material, it presents significant challenges during processing. These include high cutting forces, elevated cutting temperatures, severe tool wear, pronounced work hardening, and strong tool adhesion.
Its material characteristics dictate that severe deformation occurs under both mechanical stress and thermal effects during machining.
Thin-walled ring components offer several advantages, including lightweight construction, a high thrust-to-weight ratio, material savings, and a compact design.
These features have led to their widespread adoption in aviation engine applications.
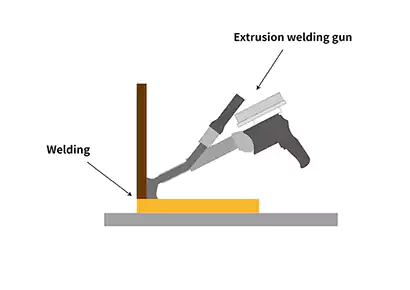
Within the aerospace manufacturing sector, manufacturers primarily produce these components through turning processes.
During machining, the material removal rate typically exceeds 90%. And thin-walled rings are highly susceptible to deformation, resulting in dimensional deviations beyond tolerances.
Thin-walled nickel-based high-temperature alloy rings combine the challenges of both difficult machinability and thin-walled construction.
Therefore, manufacturers must take appropriate measures to minimize deformation during machining.
Effective support or filling of the thin-walled sections is one of the most common and effective methods.
Machinists must select different support or filling methods for thin-walled rings of varying dimensions and structures based on their shape, size, and machining plan.
This paper uses two thin-walled rings of different sizes and structures as case studies, demonstrating three practical methods applied to mitigate turning deformation.
Fixture Support
Component Overview and Geometric Features
For example, the component shown in Figure 1 is made of GH4169 nickel-based high-temperature alloy and functions as a sealing conical ring in aircraft engines.
The cross-sectional view reveals a maximum diameter of 356.1 mm and a minimum diameter of 197.11 mm, with an overall length of 80.9 mm.
Its configuration includes two annular cavities with depths of 51 mm and 62.8 mm, respectively.
The peripheral wall thickness ranges from 1.5 to 2.5 mm, making it a typical thin-walled ring-shaped component.

Machining Process and Deformation Control
The basic turning approach includes two rough turning operations to remove most of the stock. Next, technicians perform heat treatment to relieve the stresses generated during rough machining.
After heat treatment, technicians perform a reference surface correction operation to fix the deformation caused by the heat treatment process.
Two semi-finish turning operations further remove material while leaving a 1mm allowance, and two finish turning operations complete the shaping.
Regardless of the process sequence arrangement, the final finishing operation inevitably requires turning one end, followed by flipping the workpiece to turn the other end.
To minimize deformation, it is preferable to first finish-turn the end with two annular cavities, then proceed to finish-turn the other end, as illustrated in Figure 2.

If machinists use conventional clamping methods, the tool pressure will deform the workpiece, causing machining failure.
Due to the material’s inherent properties, repeated tool retraction will only cause surface hardening or even overcutting.
Therefore, when precision turning the deep cavity end, selecting a floating auxiliary support to enhance rigidity at the machining location can mitigate machining deformation.
Auxiliary Support Design and Application
Figure 3 shows the basic structure of the auxiliary support, which consists of a spring ring and a locking nut.
During use, simply keep the locking nut loose and mount the part onto the fixture.
Then, use a dial indicator to adjust the locking nut while securing the auxiliary support against the part.
Compared to rigid support, this approach avoids over-constraint interference from machining errors while preventing loss of support function due to clearance.
Its drawbacks include a relatively complex part structure, high dimensional accuracy requirements, and manufacturing difficulty.
In addition, the operation is inconvenient, as it requires dial gauge adjustment for tension each time to ensure uniform force distribution.

Shaped Rubber Filler Support
Case Study Overview and Machining Challenges
Case Study 1: During precision turning of the opposite end, two annular cavities similarly compromised part rigidity.
Conventional machining subjected to tool pressure not only caused deformation but also triggered severe tool chatter during actual processing, rendering completion impossible.
Since machining on this end involved the outer periphery of the annular cavity, research showed that filling the cavity to enhance rigidity would more effectively improve stiffness.
This approach also helps eliminate tool chatter more directly than creating auxiliary supports.
Rubber Support Filler Selection and Fabrication
This solution employed a ring-shaped rubber support filler. The fabrication method is as follows。
1) Select rubber material with the following properties: operating temperature range of -30 to 120°C, Shore hardness of 30 to 60 HS, elastic modulus G of 525 to 1260 N/m², compression set under static load <15%, and compression set under dynamic load <5%.
2) Determine the dimensions of the vibration-damping rubber ring (see Figure 4) based on the cavity dimensions on the opposite side of the machined part.
Due to rubber’s high elasticity, the rubber ring and part should have an interference fit; thus, the rubber ring dimensions should be 1–2 mm larger than the cavity dimensions.
Subsequently, machine the vibration-damping rubber ring according to the derived dimensions.
Machining methods may include turning or heating the rubber to a molten state for mold casting.

3) When machining parts, simply insert the part into the fixture cavity.
If the rubber ring does not fill and secure the cavity firmly, use bolts or adhesive to anchor it to the fixture before clamping the part for machining.
Installation and Machining Application
Figure 5 illustrates how technicians fill and support the annular cavity.

This method has been verified to effectively enhance the rigidity of hollow components.
It significantly reduces elastic deformation caused by cutting forces and provides superior vibration damping through the use of rubber.
As a result, it effectively minimizes machining vibrations. Furthermore, this approach is relatively easier to implement compared to constructing auxiliary supports.
Low-Melting-Point Alloy Filler Support
For example, the component in Case 2 shown in Figure 6 is made of GH4169 nickel-based high-temperature alloy and functions as a connecting ring in an aero engine.
The part has a maximum diameter of 1331 mm and a minimum diameter of 1284 mm, with a total height of 31 mm.
Its configuration features an inclined U-shaped structure, where the axial depth of the U-shaped groove is 29.3 mm.
The peripheral wall thickness ranges from 1.04 to 1.27 mm, with a tolerance of ±0.15 mm.

The turning sequence must be carefully arranged.
If machinists machine the part directly, the wall thickness will experience tool pressure regardless of which section they turn first, because the part lacks sufficient rigidity.
This makes it impossible to accurately control the wall thickness dimensions.
Given the part’s simple structure and rectangular blank, the basic process approach is: turn an installation edge on the blank, complete all finishing turns in a single operation, and perform cut-off and forming.
The only challenge is enhancing rigidity at the machined sections. The optimal approach to enhance rigidity is to first turn the ring groove.
During this step, technicians use supports to brace the U-shaped groove and ensure the part maintains rigidity.
Afterward, technicians turn the inner and outer circles separately to maintain the wall thickness accurately.
If technicians turned the inner and outer circles before the U-shaped groove, they would face greater challenges in designing a support solution for the circles.
The machining concept is illustrated in Figure 7.

Selecting filling material
When selecting filling materials, technicians face challenges in designing a perfectly conforming structure if they use auxiliary fixtures for support.
Even if achievable, precision requirements would drive costs significantly higher.
Rubber filling offers excellent vibration damping and auxiliary support while conforming to the ring groove.
However, rubber’s high elasticity severely limits its effectiveness for supporting such large, thin-walled ring components.
Furthermore, improper use could cause deformation before machining due to rubber’s high expansion coefficient, which may squeeze the part.
A material with lower elasticity and higher hardness than rubber must be used for filling.
> First attempt involved common paraffin wax injection.
After solidification, a 0.1–0.2 mm gap remained between the wax and the part wall, resulting in poor adhesion.
The part system stiffness failed to meet expectations. During turning, this gap caused the machined area to move back and forth, preventing the ±0.15 mm tolerance from being met.
> Second attempt involved filling with rosin as a reinforcing agent.
Rosin formed virtually no gap with the part, meeting machining requirements.
However, post-processing revealed that rosin required heating above 160°C to melt and remove, a temperature difficult to achieve in the machining environment.
> Third attempt used gypsum as the reinforcement material.
Although the surface gypsum solidified within 10 minutes after injection, the bottom layer remained unhardened, resulting in poor uniformity.
Achieving full solidification required excessive time, significantly reducing work efficiency.
Therefore, a material was needed that could solidify uniformly within a relatively short time.
It also needed to have a low coefficient of thermal expansion, high hardness, and allow for easy removal under conventional conditions after machining.
After repeated comparisons, a low-melting-point alloy primarily composed of lead, tin, and bismuth was selected.
This alloy features a low coefficient of thermal expansion and a melting point of only 70°C.
It also produces minimal thermal effects on part deformation during the hot filling, machining, and melting separation processes.
Operation process
The entire operation process is as follows.
1) Mount the workpiece on the machine tool while heating the low-melting-point alloy to a molten state using an electric furnace (or induction furnace).
2) Pour the molten low-melting-point alloy into the part’s groove, filling it uniformly to the predetermined depth. The pouring process takes only 5–7 minutes.
3) Allow the low-melting-point alloy to cool completely (3–5 minutes).
4) Inspect the surface for casting defects (including porosity, voids, and gaps between the alloy and the part).
5) Measure internal dimensions. If no abnormal changes are detected, proceed to turning operations.
6) After machining, immerse the part in a 70–80°C hot water bath to melt away the low-melting-point alloy.
Subsequently, perform dimensional and geometric accuracy inspections.
7) Recycle the low-melting-point alloy for reuse.
This method has been verified to effectively maintain part rigidity, with wall thickness accuracy within ±0.15 mm being relatively easy to achieve.
Although low-melting-point alloy requires pouring and recycling, it remains the optimal choice when compared holistically with paraffin, rosin, and plaster.
Conclusion
This paper presents practical cases showing how deformation during turning operations of thin-walled high-temperature alloy rings can be controlled.
Two methods are highlighted: auxiliary support using fixtures and reinforcement with filler material.
Practical verification confirms that selecting either auxiliary support or filler material reinforcement, based on specific conditions, enhances the rigidity of machined areas.
This approach not only ensures dimensional accuracy but also improves turning efficiency.
These approaches are worth adopting for machining other thin-walled ring components with similar structures.