China CNC Milling » Blog » A Brief Analysis of Springback in Extruded Profile Bending
FAQ
What materials can you work with in CNC machining?
We work with a wide range of materials including aluminum, stainless steel, brass, copper, titanium, plastics (e.g., POM, ABS, PTFE), and specialty alloys. If you have specific material requirements, our team can advise the best option for your application.
What industries do you serve with your CNC machining services?
Our CNC machining services cater to a variety of industries including aerospace, automotive, medical, electronics, robotics, and industrial equipment manufacturing. We also support rapid prototyping and custom low-volume production.
What tolerances can you achieve with CNC machining?
We typically achieve tolerances of ±0.005 mm (±0.0002 inches) depending on the part geometry and material. For tighter tolerances, please provide detailed drawings or consult our engineering team.
What is your typical lead time for CNC machining projects?
Standard lead times range from 3 to 10 business days, depending on part complexity, quantity, and material availability. Expedited production is available upon request.
Can you provide custom CNC prototypes and low-volume production?
Can you provide custom CNC prototypes and low-volume production?
Hot Posts
Currently, extruded profiles are widely used in various industries such as construction machinery and architecture.
Extruded profiles are typically produced through secondary processing of sheet metal and often feature hollow structures.
Therefore, the forming process experience for sheet metal cannot be directly applied to extruded profiles, particularly when dealing with springback.
Additionally, the curved surfaces of extruded profiles often have mating relationships with other components.
Therefore, ensuring that the dimensions of the post-processed parts conform to the drawing specifications is critical.
The following analysis will be based on two typical cases from our company’s production site.
Bending Springback of Rectangular Tubes
Part Specifications and Initial Process Design
Figure 1 shows Part 1, with raw material specifications of Q235B-J40mm × 25mm × 2.5mm, a bending angle of 90°, and an outer radius of R219mm after forming.
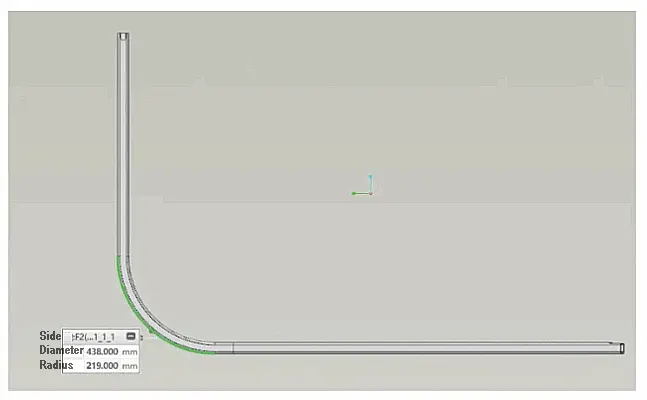
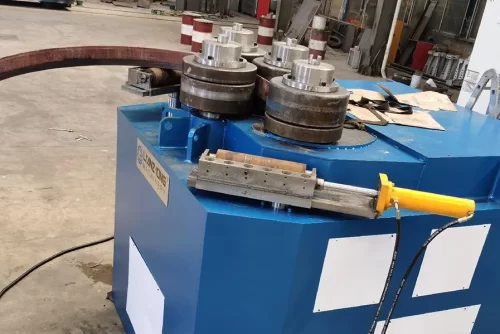
After analyzing the manufacturing process, it was ultimately decided to use a CNC bending machine and the pull bending process to produce this part.
Considering that springback is inevitable in metal forming, the bending process diagram shown in Figure 2 was designed for the initial production run.
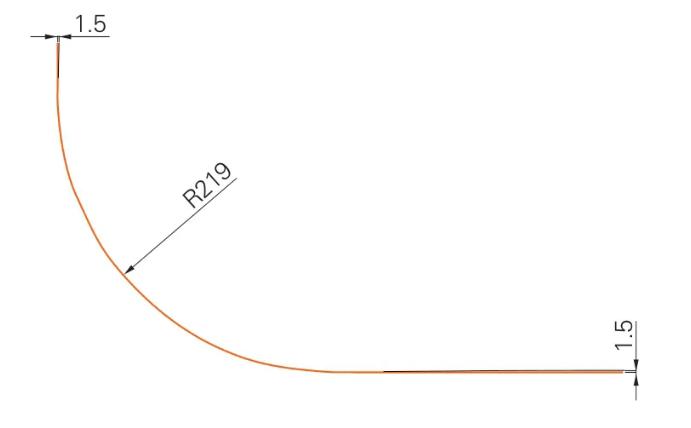
After bending the tube, there is a 1.5mm gap at the end of the part compared to the inspection plate to achieve alignment with the drawing at the radius section.
The tube bending die is designed according to the radius specified in the drawing, and the theoretical alignment of the R section is achieved by adjusting the bending angle.
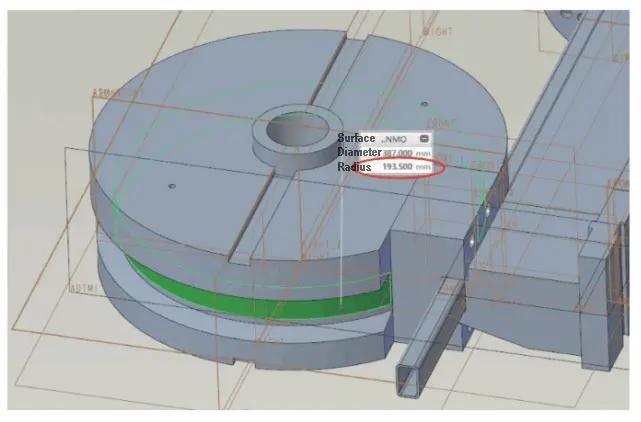
The die design is shown in Figure 3.
Analysis of Springback and Initial Production Issues
Considering material tolerances and manufacturing tolerances, the R design inside the die is R193.5 mm, and the forming surface is 40 mm.
During forming, the surface where the raw material width of 25 mm is located faces upward.
This results in an outer R of R218.5 mm for the finished product.
Following the schedule requirements, the bending die manufacturing and production debugging were carried out.
After the first batch of parts was produced, inspection plate testing revealed that the maximum gap between the outer radius (R) of the part and the inspection plate was 8 mm.
Since this position must coordinate with glass during assembly, the excessive gap adversely affects the glass bonding.
As a result, the part was deemed non-conforming and required rectification.
After analyzing the part’s condition on-site, the primary cause of the excessive deviation was identified: the theoretical bending angle of the part is 90°.
Springback Compensation and Mold Adjustment
To ensure the part’s angle aligns with the drawing specifications, multiple debugging verifications were performed.
After these checks, the actual bending angle set on the bending machine was 97°, with angle springback compensation applied.
After bending, when the bending machine’s clamping mechanism is released, the part experiences springback.
The angle is then adjusted to 90° through compensation.
However, due to insufficient consideration in the early stages, only angle springback was accounted for, without considering that it could cause changes in the R-angle.
Analysis of R-Angle Deformation
During the actual springback process, the part’s deformation is not merely an angular change.
Its overall change trend is shown in Figure 4.
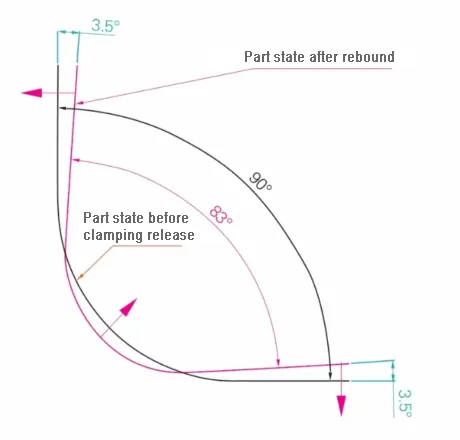
As shown in Figure 4, the deformation of the part is a combination of “elastic deformation + plastic deformation.”
After the equipment releases its grip, the straight sections at both ends of the part spring back outward.
At the same time, the springback on both sides causes the R section to deform inward toward the part.
The overall trend is indicated by the magenta arrows in the figure.
This deformation trend occurs in tandem, not independently.
Throughout the entire springback process, the part’s angle ultimately reaches 90°.
However, the radius of the formed area increases, resulting in a gap between the part and the inspection plate.
This does not meet the drawing specifications or the requirements for subsequent glass bonding.
Due to the absence of suitable measuring instruments on-site, traditional graphical methods were used to calculate the actual radius.
Measurements revealed that the maximum gap between the R section and the inspection plate was 8 mm.
This gap was primarily located at the center of the R arc.
Based on this data, a graphical representation was created, as shown in Figure 5.

Radius Adjustment and Mold Modification
After drawing, the actual outer radius R after bending is approximately R237.8mm.
Considering the actual design angle of 97° during bending and referencing the differences between these two sets of values, along with practical production experience, adjustments are required.
To ensure that the actual outer radius R after forming is R218.5 mm, the theoretical outer radius R should be R200.7 mm, which corresponds to a centerline radius of R188.2 mm.
When calculating the radius during drawing, the selection points for the three-point arc are quadrant points, which may differ from the actual values.
Considering this factor along with on-site experience, the centerline radius was ultimately determined to be R191 mm.
The inner R was then adjusted to R178.5 mm for mold modification.
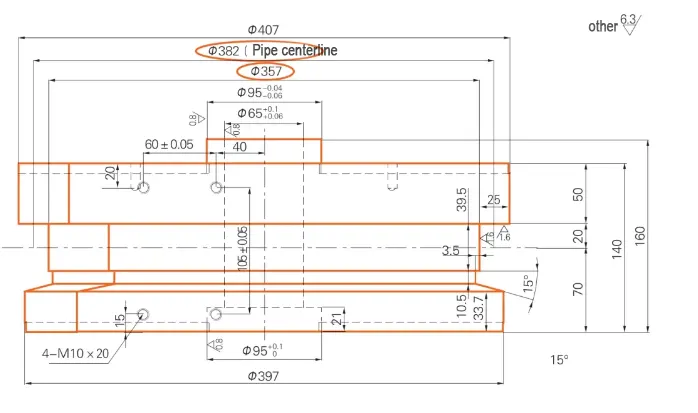
The modified main wheel mold drawing is shown in Figure 6.
Verification and Final Results
After completing the drawing revisions, the parts were remanufactured and the molds were debugged and verified.
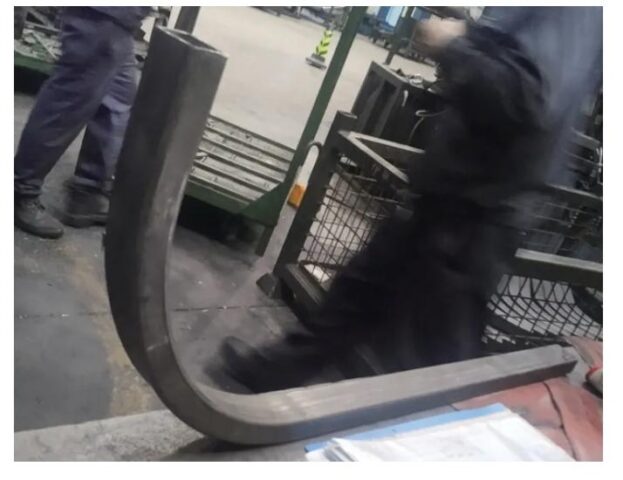
The parts produced using the new molds are shown in Figure 7.
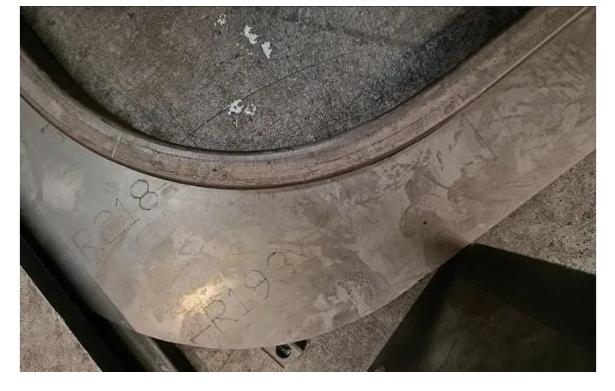
Inspection plates were used for testing, and the results are shown in Figure 8.
From the test results, it can be seen that there is basically no gap between the R part and the inspection plate at this time.
Assembly verification was performed in this state, and no abnormalities were found.
The rectification achieved the expected results.
The final conclusion is that the springback coefficient for this type of bent pipe is approximately 8%.
Bending Springback of Irregularly Shaped Tubes
Part Specifications and Initial Mold Design
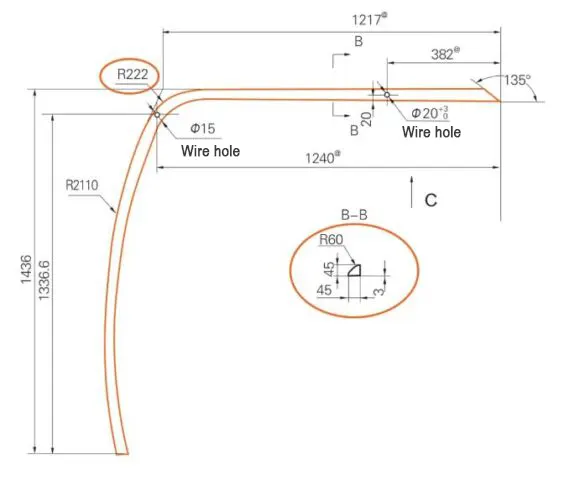
Part 2, as shown in Figure 9, has raw material specifications of Q235B-Y, with dimensions of 45 mm × 45 mm × R60 mm × 3 mm.
After forming, the outer R radius is R222 mm.
This part has a unique cross-section resembling a right-angled triangle.
After forming, the outer R section becomes one of the vertices of the triangle.
Prior to mold design, considering that the outer R section is a vertex of the triangle, springback is expected to be minimal.
Therefore, springback was not factored into the design, and the mold was designed directly based on theoretical data, as shown in Figure 10.
Initial Production Results and Measurement of Deviation
After the mold was completed and debugged, the actual part status was as shown in Figure 11.
As can be seen from the figure, the part was stuck to the clearance groove on the inspection plate.
The width of the clearance groove reserved on the inspection plate was 5 mm, indicating that the highest point of the arc had shifted inward beyond 5 mm.
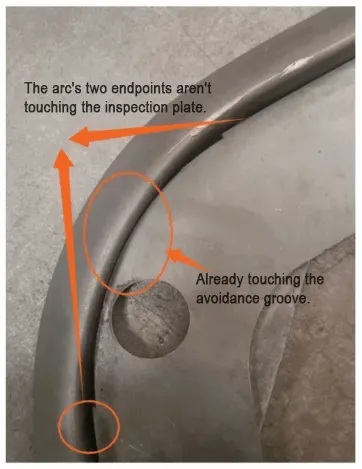
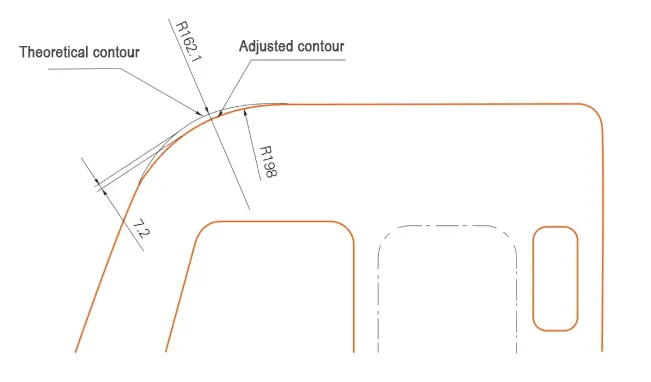
Measure the distance between the two endpoints of the arc at this location on the part.
Then, measure the distance to the actual contact position of the inspection plate and to the theoretical endpoints of the arc.
Perform graphical calculations to determine that the midpoint of the arc is offset inward by approximately 7.2 mm.
Glass Modification and Final Verification
Due to tight project deadlines at the time, it was not possible to re-verify the mold modifications.
Therefore, based on this data, modifications were made to the mating glass (flat glass), as shown in Figure 12.
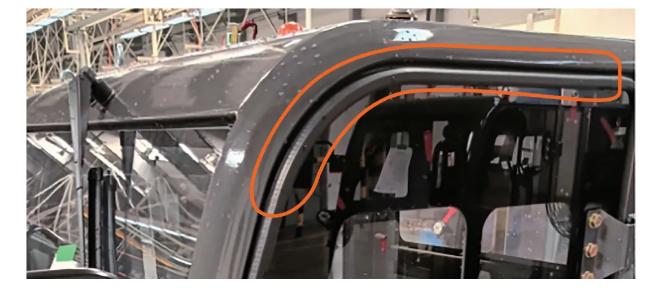
Before the glass was modified, there was interference between the position shown in the figure and the part.
After the glass was modified, this phenomenon was eliminated and the overall gap along the circumference was uniform, as shown in Figure 13.
Since this position does not affect the overall performance of the machine and the appearance change is not obvious, it was ultimately decided to solidify this production status.
No further modifications were made to the mold for verification.
For this part, the springback coefficient is different from that of a rectangular tube.
After calculation, it is approximately 18%.
Conclusion
The above analysis explains the springback phenomenon of two types of pipe fittings at the site.
Whether it is rectangular pipe or irregular pipe, due to their special cross-sections, springback inevitably occurs during the bending process.
Currently, there are no standard data tables available for reference or calculation of this springback amount.
Therefore, manufacturers need to collect and summarize data based on the consistency of the raw materials they purchase and the characteristics of the parts.
Additionally, for profile bending, one must not only consider springback at the bending angle but also, if R-angle sections are involved, consider springback at the R-angle.
These two factors are interconnected.
Springback at the bending angle can be compensated for by adjusting the bending parameters.
However, springback at the R-angle must be comprehensively considered during the design of the bending fixture.
